Profile Management
Add comprehensive user profile management with customizable form fields and account information display using the profile details plugin
Overview
This tutorial shows you how to add comprehensive user profile management to your SuperTokens authentication flows.
The guide makes use of the plugins functionality which provides a complete profile management interface with customizable form fields, account information display, and automatic third-party data integration.
The functionality integrates with the progressive profiling plugin by default. This allows you to:
- Gradually collect user information through the progressive profiling flow
- Display collected information in the profile details interface
- Keep both systems synchronized automatically
Before you start
The profile details plugin supports only the React and NodeJS SDKs.
Support for other platforms is under active development.
You need to start from a working SuperTokens setup. If you haven’t done that already, please refer to the Quickstart Guides.
Steps
1. Initialize the backend plugin
1.1 Install the plugin
npm install @supertokens-plugins/profile-details-nodejs1.2 Update your backend SDK configuration
The backend plugin exposes new endpoints which, in turn, get used by the frontend implementation.
import SuperTokens from "supertokens-node";
import ProfileDetailsPlugin from "@supertokens-plugins/profile-details-nodejs";

SuperTokens.init({
  appInfo: {
    appName: "My App",
    apiDomain: "https://api.example.com",
  },
  recipeList: [
    // your recipes (Session recipe is required)
  ],
  experimental: {
    plugins: [
      ProfileDetailsPlugin.init({
        sections: [
          {
            id: "personal-details",
            label: "Personal Information",
            description: "Your personal details",
            fields: [
              {
                id: "firstName",
                label: "First Name",
                type: "string",
                required: true,
                placeholder: "Enter your first name",
              },
              {
                id: "lastName",
                label: "Last Name",
                type: "string",
                required: true,
                placeholder: "Enter your last name",
              },
              {
                id: "company",
                label: "Company",
                type: "string",
                required: false,
                placeholder: "Enter your company name",
              },
            ],
          },
          {
            id: "preferences",
            label: "Preferences",
            description: "Customize your experience",
            fields: [
              {
                id: "avatar",
                label: "Profile Picture",
                type: "image-url",
                required: false,
                placeholder: "https://example.com/avatar.jpg",
              },
              {
                id: "theme",
                label: "Preferred Theme",
                type: "select",
                required: false,
                options: [
                  { value: "light", label: "Light" },
                  { value: "dark", label: "Dark" },
                  { value: "auto", label: "Auto" },
                ],
                defaultValue: "auto",
              },
            ],
          },
        ],
        registerSectionsForProgressiveProfiling: true, // Optional: defaults to true
      }),
    ],
  },
});
Supported field types
The plugin supports the following field types:
| Field Type | Description | Value Type | Example Use Case |
|---|---|---|---|
string |
Single-line text input | string |
Name, title, company |
text |
Multi-line text area | string |
Bio, description, comments |
number |
Numeric input | number |
Age, salary, experience |
boolean |
Checkbox input | boolean |
Newsletter subscription |
toggle |
Toggle switch | boolean |
Feature preferences |
email |
Email input with validation | string |
Contact email |
phone |
Phone number input | string |
Contact number |
date |
Date picker | string (ISO 8601 format) |
Birth date, start date |
select |
Dropdown selection | string |
Country, department, role |
multiselect |
Multiple selection dropdown | string[] |
Skills, interests, languages |
password |
Password input | string |
API keys, secure tokens |
url |
URL input with validation | string |
Website, social profiles |
image-url |
Image URL input with preview | string |
Profile picture, logo |
Third-party data integration
The plugin automatically integrates with third-party authentication providers to populate profile fields. When users sign in using external providers, the plugin maps provider data to profile fields (if the fields are configured):
firstName: Maps fromname,given_name, orfirst_namelastName: Maps fromfamily_nameorlast_nameavatar: Maps frompictureoravatar_url
2. Initialize the frontend plugin
2.1 Install the plugin
npm install @supertokens-plugins/profile-details-react2.2 Update your frontend SDK configuration
Initialize the frontend plugin in your existing configuration.
With the following setup the /user/profile path renders the profile details page.
import SuperTokens from "supertokens-auth-react";
import ProfileDetailsPlugin from "@supertokens-plugins/profile-details-react";

SuperTokens.init({
  appInfo: {
    appName: "My App",
    apiDomain: "https://api.example.com",
    websiteDomain: "https://example.com",
  },
  recipeList: [
    // your recipes
  ],
  experimental: {
    plugins: [ProfileDetailsPlugin.init()],
  },
});3. Test the implementation
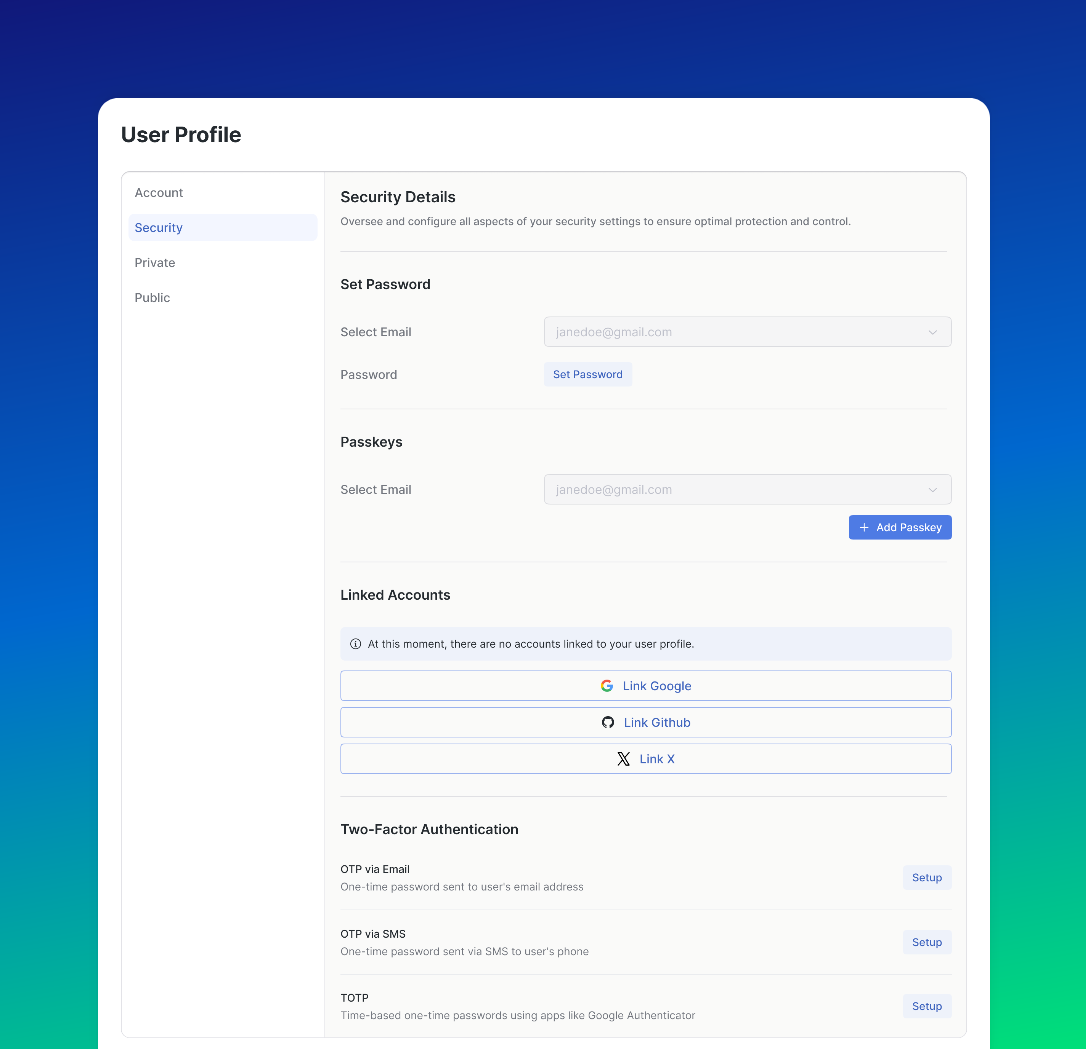
Authenticate and then visit the /user/profile path.
You should see the new interface that renders the profile data.
Customization
Custom field components
To add custom rendering behavior for fields you have to pass an override during plugin initialization.
import ProfileDetailsPlugin from "@supertokens-plugins/profile-details-react";
import { CustomStringInput, CustomStringView } from "./your-custom-components";

SuperTokens.init({
  // ... other config
  experimental: {
    plugins: [
      ProfileDetailsPlugin.init({
        override: (oI) => ({
          ...oI,
          fieldInputComponentMap: (originalMap) => ({
            ...originalMap,
            string: CustomStringInput,
          }),
          fieldViewComponentMap: (originalMap) => ({
            ...originalMap,
            string: CustomStringView,
          }),
        }),
      }),
    ],
  },
});
Custom user interface
To create your own UI you can use the usePluginContext hook.
It exposes an interface which you can use to call the endpoints exposed by the backend plugin.
import { usePluginContext } from "@supertokens-plugins/profile-details-react";

function CustomProfileComponent() {
  const { api, t, fieldInputComponentMap } = usePluginContext();
  const [profile, setProfile] = useState(null);

  const handleGetDetails = async () => {
    const result = await api.getDetails();
    if (result.status === "OK") {
      setProfile(result.profile);
    }
  };

  const handleUpdateProfile = async (data) => {
    const result = await api.updateProfile({ data });
    if (result.status === "OK") {
      console.log("Profile updated successfully");
    }
  };

  return (
    <div>
      <h2>{t("PL_CD_SECTION_ACCOUNT_LABEL")}</h2>
      <button onClick={handleGetDetails}>Load Profile Details</button>
      {/* Your custom form components */}
    </div>
  );
}
Next steps
Besides profile details management, you can also explore other user management features: